Intro
ancoreShare Extension allows you to add line elements on the reports for creating better structures in your report, or just to show segregation between elements and sections.
Basic Settings
Add and select a line element and set general element properties.
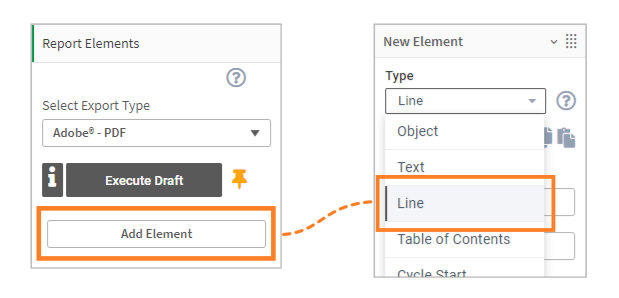
Add line element
 | |
CaptionWhen you add a line element, the caption is automatically populated as Line. | 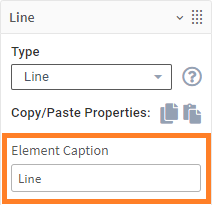 |
Line width and colorUse the slider to define the Line width (thickness). The unit of the line width is always in points (pt). | 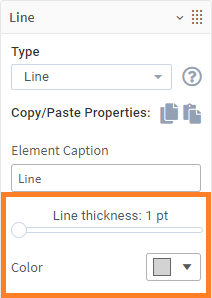 |
Calculation conditionIn the Calculation Condition field, click fx to open the expression editor. Specify an expression to set a condition that needs to be fulfilled (true) for the object to be displayed on the report. It works just like the Activation Condition but is specific to each report element. Refer to the Qlik documentation to know more about expressions. | 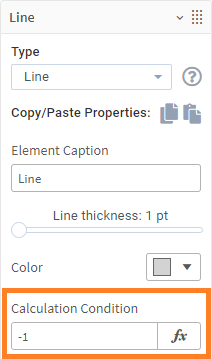 |
Element Properties | |
AnchorIf there is another existing element on your sheet that comes before in order, you will see an Anchor tab. This setting defines the relative position of elements on the report page. Drag the orange box "B" to set the position of this line element with respect to the preceding element "A" or choose an anchor position from the drop-down list above. | .png) |
PositionClick the Position tab to define general position settings for the line element on your report.
To learn more about how all the positioning and sizing settings work together and affect each other, and how to precisely position the elements on your report by combining them, go to Positioning and Sizing Elements. | 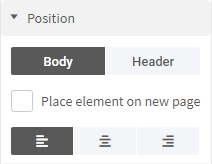 |
SizeClick the Size tab to set the Type and Width of the line element size on your report. You can choose from any of the following:
A line element has no height setting, but you can set the thickness of the line in Basic Settings.To learn more about how all the positioning and sizing settings work together and affect each other, and how to precisely position the elements on your report by combining them, go to Positioning and Sizing elements. | 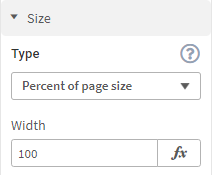 |
SpacingClick the Spacing tab to define the distance of the line element from neighboring elements on your report. You can do this separately for Left, Right, Top, and Bottom. The behavior of spacing depends on the selected size type.
To learn more about how all the positioning and sizing settings work together and affect each other, and how to precisely position the elements on your report by combining them, go to Positioning and Sizing elements. | .png) |
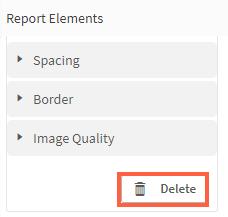
Deleting line elementAt any time, you can click the Delete button to delete the line element. | |
 | .png) |
You can add as many lines as you want using the Add Element button and repeat the procedure explained above.
Here's an example showing a report with line elements (highlighted in Pink) positioned with other elements for creating structured reports.
.png)
Next Steps:
- Now add Charts, Text, or Tables to your report
- Learn more about positioning all elements
- See a report draft in the preview window
- Or, share and export the report