Intro
ancoreShare Extension allows you to add multiple different elements to your report for customizing and styling your reports according to your organizational requirements to create pixel-perfect reports directly in Qlik Sense.
You can add Qlik Sense objects from multiple sheets, text elements, and line elements. It supports all the different types of visualizations available in Qlik Sense. Besides this, you can also add visualizations from other Sense integrated extensions as well.
This section shows you how the adding of elements work and how to work with them:
- Adding elements to report
- Element types
- Basic element properties
- Working with elements - copy, reorder and delete
- Export file type
Adding elements to reportTo add Qlik objects and other elements to your report, perform the following steps.
By default, the elements are displayed to the report one after another, top to bottom one below another in the order of adding them in the properties panel. NOTE: If you already have several elements in your report, you might have to scroll down to see the Add Element button, as it is always at the bottom of this menu section. | 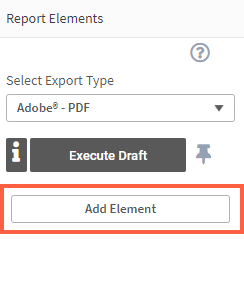 |
You can create pixel-perfect reports by positioning and sizing each element precisely. To learn more about how to precisely position the elements on your report by combining various settings, see the Positioning and Sizing Elements section.
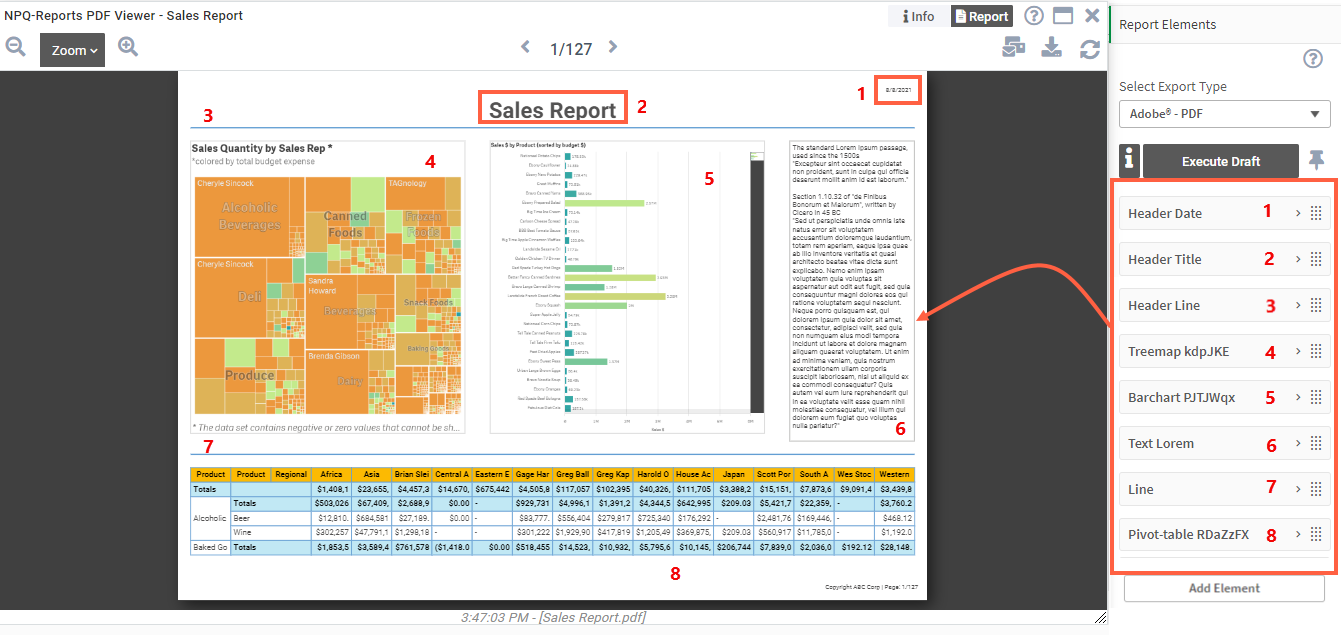
Here's a sample report with multiple elements. The settings on the properties panel correspond to the image on the left.
We recommend using the Preview window while working with elements. This will help you in viewing how the elements are being added to your report.
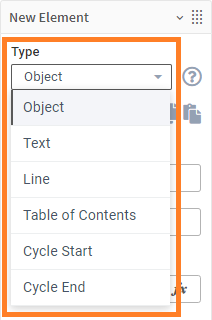
Element typesAfter adding an element you can choose one of the following types: Regular Elements
Special Elements
|  |
Element properties
Once you chose an element, the corresponding properties are displayed in the properties panel on the right. You can use these properties to customize how the element is rendered on your report.
The following image shows the properties panel of each element menu box for the various types of elements:
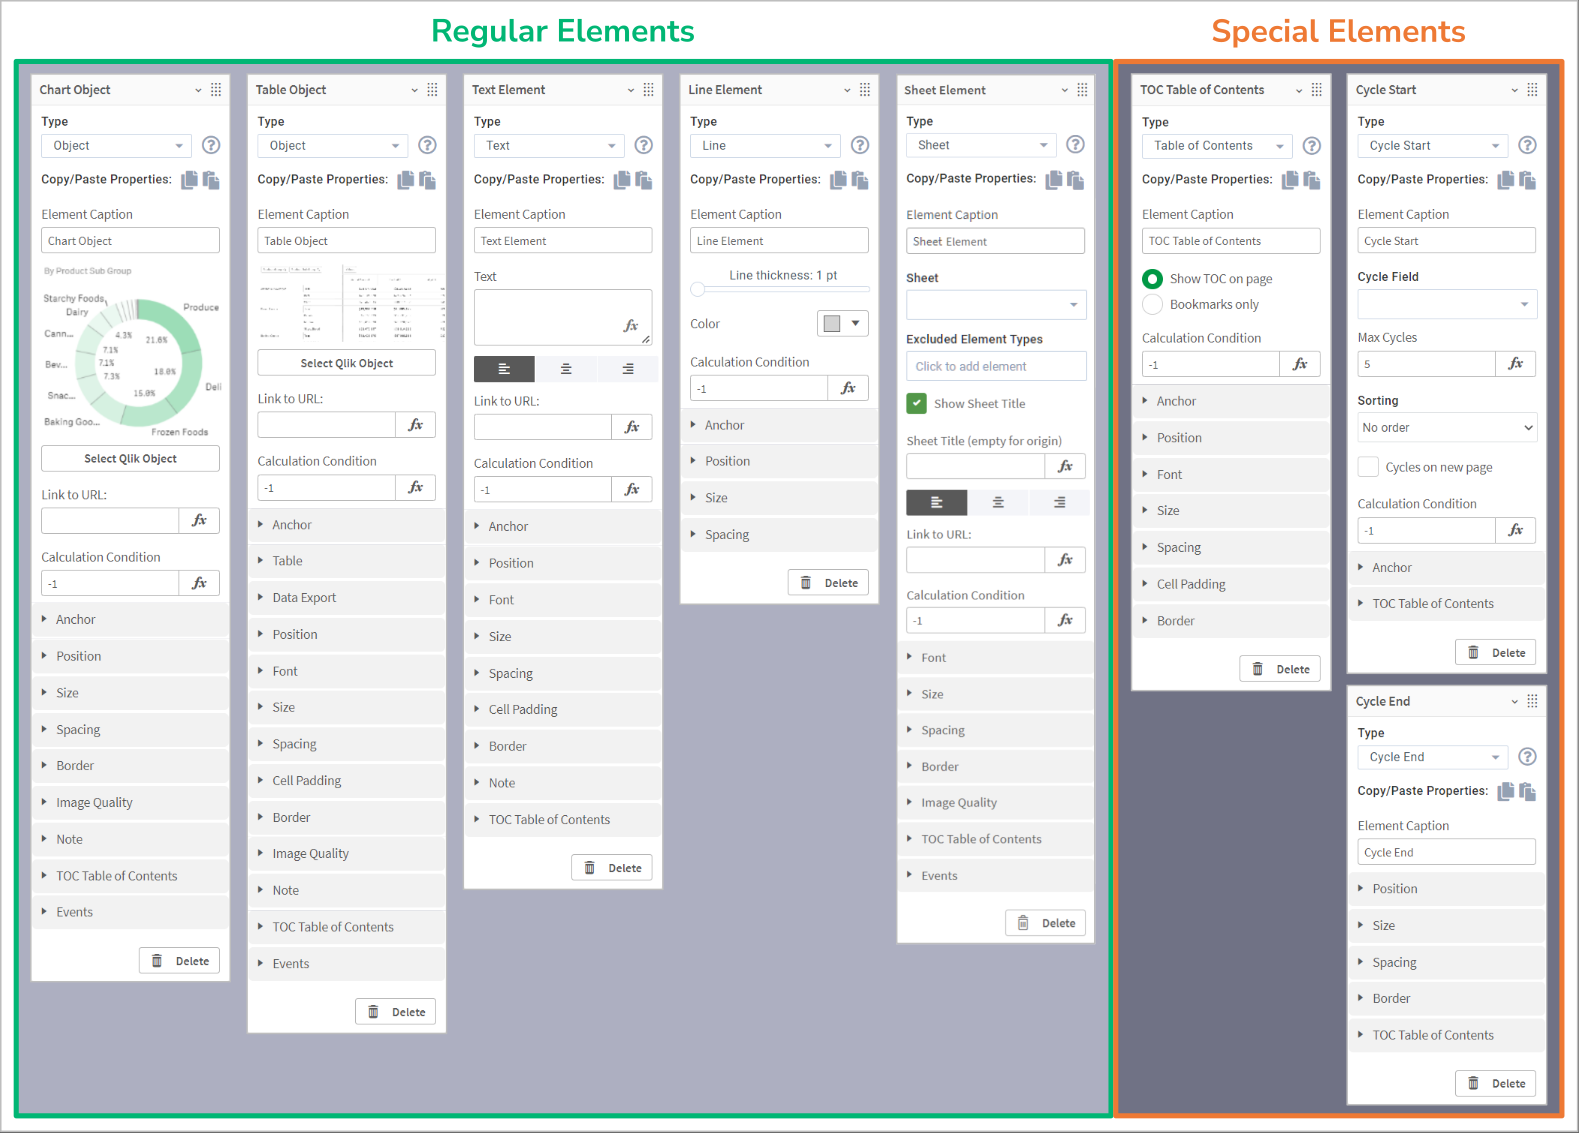
By default, chart-specific properties are displayed when you click Object on the element type. The Table-specific properties are displayed when you select and add a table from the Sense sheet.
The basic properties of all regular elements are:
Caption
By default, an element Caption is generated according to the selected element type.
You can rename this field to provide a meaningful caption that will help you in navigating through your report elements.
Calculation condition
Use the Calculation Condition field, to specify an expression to display the element. It works just like the activation condition but is specific to each element. You can specify the value as a calculated formula. Refer to the Qlik documentation to know more.
Working with elements
For ease of use, you can copy/paste elements and reorder them at any time to change the report design.
Copying element propertiesYou can copy the settings for one element for styling another element. For example, you may want to apply the same chart style, line, or table style to another element of the same type. For this, click the copy icon corresponding to the element whose properties you want to reuse, and click the paste icon on the element where you want to copy this style. | 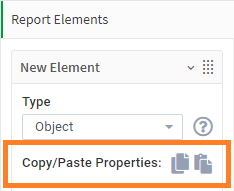 |
Reordering elementsTo quickly reorder elements on the report, use the drag options to move the elements up or down in the report. Remember that, reordering will only change the position of the element on the report, the other element properties for sizing and positioning will remain the same. See the Positioning and Sizing Elements section to understand how these settings work together. | 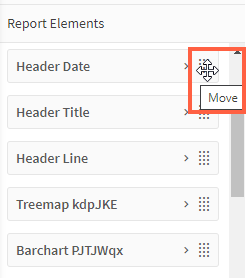 |
Deleting elements
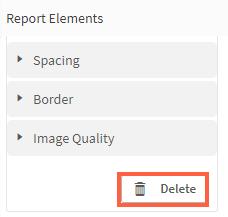
At any time, you can click the Delete button to delete the element.Optionally, right-click the element in the properties panel and click Delete.
 | .png) |
Export file type
Before you execute the creation of your report, you can specify which file type should be generated.
For this, select the relevant option at the top of the Report Elements section in the properties panel from the Select Export Type drop-down list.
Use the Data Exports only option to only download the data from your table objects.
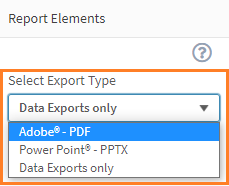
If you have enabled Data Export Downloads, we recommend keeping the export file type to Data Export only while you are designing to see only the data that you want to export quickly.
Next Steps:
You can now proceed to configure properties for different element types: