IntroancoreShare Server allows you to configure condition-based and flexible styling formats for your Sense table object. You can specify colors, font styles and alignment for each column in the table and set conditions or Qlik Expressions to further define styles for specific cells. QlikView | 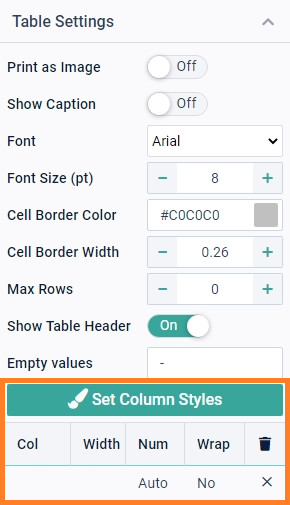 |
- The style settings in the column style editor override the General table settings specified in the settings bar.
- Styles within the column style editor are respected in order of precedence from top to bottom - last one rules.
- Checkboxes allow to NOT set a style and therefore preserve from the preceding settings.
For example, In style 1 if you have specified all sales totals under 5 Million should be filled with Red. After that, if you add a style 2 with the condition stating sales totals column should be filled in Green, then the table will respect style 2, and sales totals cells will be filled in Green even if the totals are less than 5 Million.
However, if you uncheck the checkbox corresponding to the fill color, then the totals cells will be filled in Red.
Now, let's see how you can work with column styling.
The following sections will explain:
- Column Style Editor:
- Column Content Settings (outside of the editor in the settings bar)
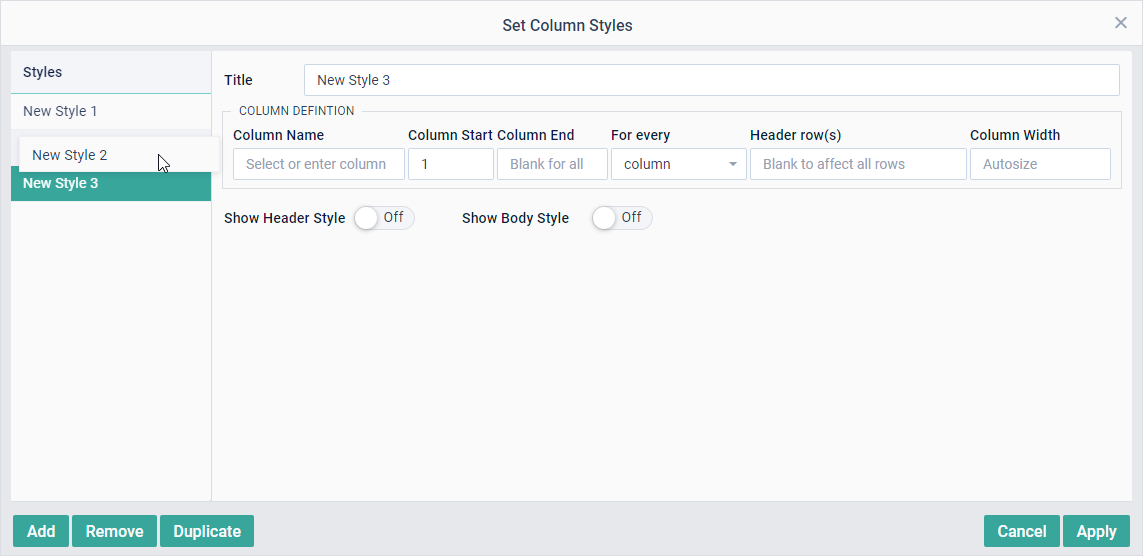
Add Column StyleTo access the editor and specify conditions that will govern the table headers, totals rows, or columns, click the Set Column Styles button in Table Settings.
| |
Column DefinitionSpecify to wich column(s) the added style should be applied. You can either go by column name for one column, or by column number for one or more columns.
Column NameProvide the column name on which you want to apply the style. Alternatively, start the name with "=" to provide a Qlik expression. This enables you to also work with dynamic dimensions or to control the column for which you create this style for example with a Qlik Variable input object. The columns names are the same as those in your Qlik App. If you provide a column name, the other fields for column numbers mentioned below are hidden, as you are defining the style for this particular column. If Load Metadata was executed in the source of this object, a list of available column names will be suggested. Refer to the Qlik documentation to know more about expressions. Column Numbers | |
See example on the right showing column numbers.
Column WidthUse this field to specify the column width. By default, the width is set to Autosize.If specified, the number is calculated in the Report Unit set in the Report Settings (default is mm). | 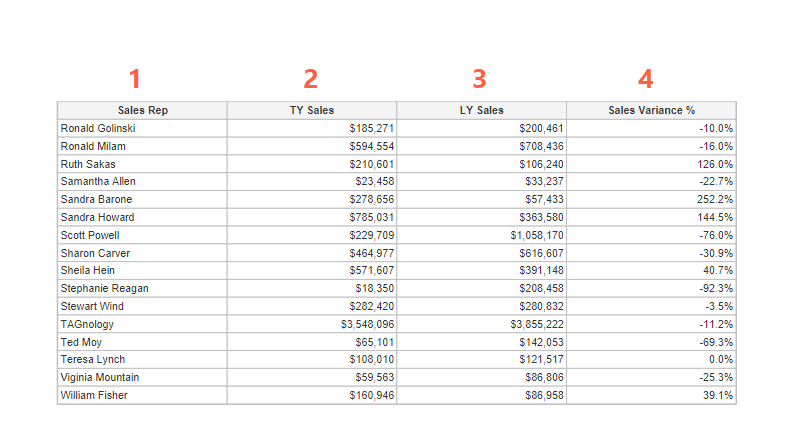 |
Header StyleTo define a style for headers, toggle to enable the Show Header Style option, and specify:
| |
Body styleTo define a style for table cells, toggle to enable the Show Body Style option.
Specify rows
Set style
| |


For example: If you want only the body fill color to be changed for a specific condition while keeping the rest of the properties the same as the previous style. Add a new style, select only the checkbox corresponding to the fill color and specify the color. The new style will respect all other properties defined in the previous& style, but with the new fill color.
Once your are done with setting your styles, click Apply.
Example
Let us look at an example for styling headers and columns to understand how it works.
Consider a Sales report, where you want to highlight whether the sales target was achieved or not.
For this, let us assume that the sales target was $50 Billion.
Now, we can define two conditions. One for those who achieved the target, and another for those who did not. You can define just one condition too, and the rest of the cells will follow the default styling.
Step 1 - Set the first style: Let us first define a condition for the cells that meet the target. | .png) |
Step 2 - Set the second style: Let us now define a condition for the cells that do not meet the target. Click the Add button to add another condition. | .png) |
Result: Here's a sample report showing how the conditions are applied to different column cells. As you can see, all the cells where totals exceed $5 Billion are highlighted in Green, and the ones having less than $5 Billion are highlighted in Red. | 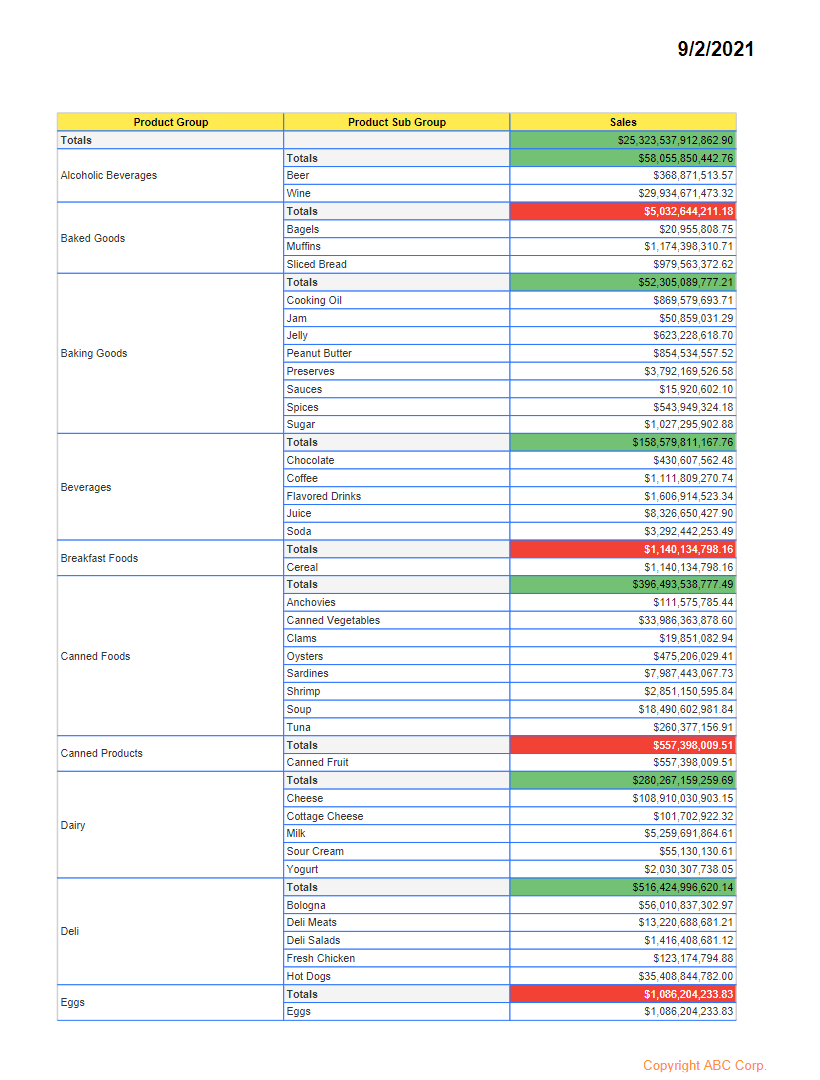 |
Similarly, you can define any style for your table. Note The order of adding styles is very important as the styles are respected in order of precedence. | |
Column Content Settings
This setting is mainly here for historic reasons, before the Column Style editor was added and ancoreSoft products are always developed very thoroughly with consideration of existing installations and downwards compatibility. Therefore the Width and Num setting targets the same property as Width and Alignment in the Column Styles editor. However, the Wrap setting is only available here. Therefore it is recommended to leave the Width empty and Num to Auto, and use the Column Styles editor instead to prevent the same properties from being overwritten unintentionally and getting confused. Important The settings defined here, override the width and alignment setting defined in the Column Styles editor. | 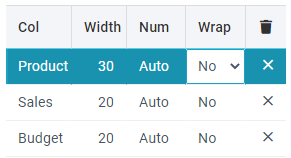 |
To specify column styles using the settings here, click a blank space under Col and provide the name of the column for which you want to define the width. The settings will work only if you provide a valid column name. The columns names are the same as those in your Qlik App.
Then specify the following:
- Width: Provide the width of the column. Remember that the sum of widths for all columns must not exceed the width defined in the Size of the table element itself.
NOTE: This overrides the Width setting in the Column Style editor. - Num: Specify if the column content is to be considered as a number or a text string. This impacts the content alignment inside the table cells, as the numbers are right-aligned, and the text is left-aligned.
NOTE: This overrides the Alignment settings in Column Style editor.- Yes: Content will be right-aligned.
- No: Content will be left-aligned.
- Auto: Select this option to let ancoreShare detect the content type automatically. For example, years are treated like numbers.
- Wrap: Specify whether to wrap text inside the table cells or not. By default, the content of table cells does not wrap and clips whole words or complete numbers if the column width is too small. To allow wrapping for showing the whole content, select the Yes option here.
Next Steps:
- Now add Charts, Text elements, or Line and Rectangles to your report.