Intro
As the name suggests, the text element lets you add your custom text to the report. For example, you can use this element to add headings for your report, page titles, or use variables and Qlik expressions for dynamic content, like page numbers, time/date, KPIs, filter values and more to the report.
You may use the text element to specify headers and footers for your report. For example, to add copyright information at the bottom of each page or add a category as a header. Again, all this is possible with the ancoreShare Designer.
A special feature here is the option to transform the content of your Text element to a Barcode on your report.
The following sections explain how you can work with text elements to use their powerful functionalities.
Basic Settings
Add and select a text element and set general element properties.
Adding text elementTo add a text element to your report, drag the text icon onto your report designer sheet. | 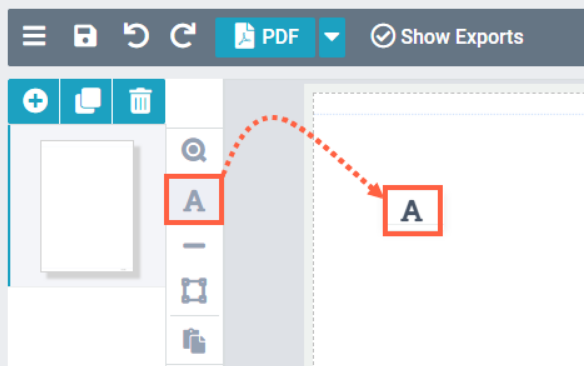 |
Title and alignmentWhen you add a text element, the Title is automatically populated as New Text n, where n is the number of the text element added to the report. You can edit this field to enter static content to your text element. If you set dynamic content for this element (see next section), the title will only be visible in the designer and will get replaced with the dynamic content when exporting the design. AlignmentUse the alignment buttons to justify the content of the Text element left, center, or right. | 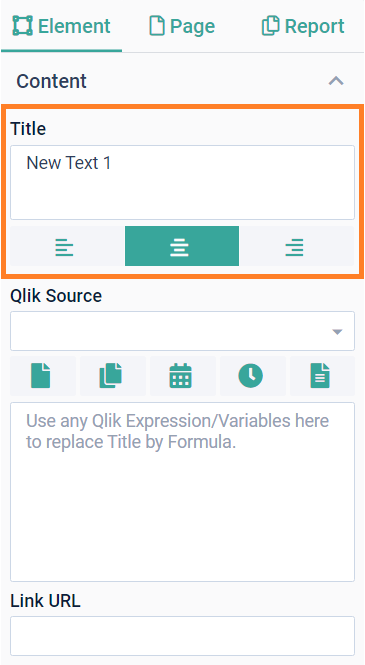 |
Dynamic contentThis is the area where you can specify dynamic content for your element, like page numbers, the date, KPIs or filter values. You have two options to create dynamic content, either by using the built-in ancoreShare variables for things like page number or the report name, or select a Qlik Source to access any kind of Qlik Expressions or variables from that app. ancoreShare VariablesThe icons displayed above the content area offer the following variables from left to right:
You can combine multiple of those variables with each other and with text. | 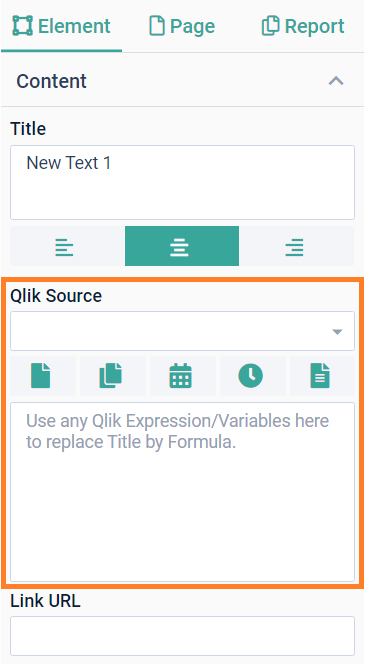 |
*Page numbers are in respect of the actual export, not the pages in the Designer, as pages can get added up by generating them automatically/dynamically due to tables spanning over several pages or a page cycle repeating pages with different values.
For example, paste "Page %%Page%% of %%Pages%% " to create "Page 1 of 5" on your export.
To better plan the space for this sample Text element, give it a Title like "Page X of X". This gives you a good idea of how much space the element will take on the report.
Or another example would be to set the Title to "YYYY-MM-DD" when working with a date variable, or things like "###.##" for numeric values.
Qlik Expressions
Using Qlik Expressions and Variables lets you include KPIs, sums, selection or filter values and other data from your Qlik apps in your report.
To use this functionality, you need to select a Qlik Source first. If your report has not more than one Source defined, it will already be pre-set. Should you have multiple Sources connected to your report, you need to choose the app that contains the relevant data for your expression.
Qlik Expressions must always begin with "=".
This way you can make sure that your expression is correct.
The Qlik Expression Editor can also give a lot of help and context, like pasting functions or helping with syntax - especially when working with more complex formulas and combinations.
Let's see some examples for dynamic text content:
Examples
Here are some examples for dynamic content in Text elements - see the result for each example in the images below.
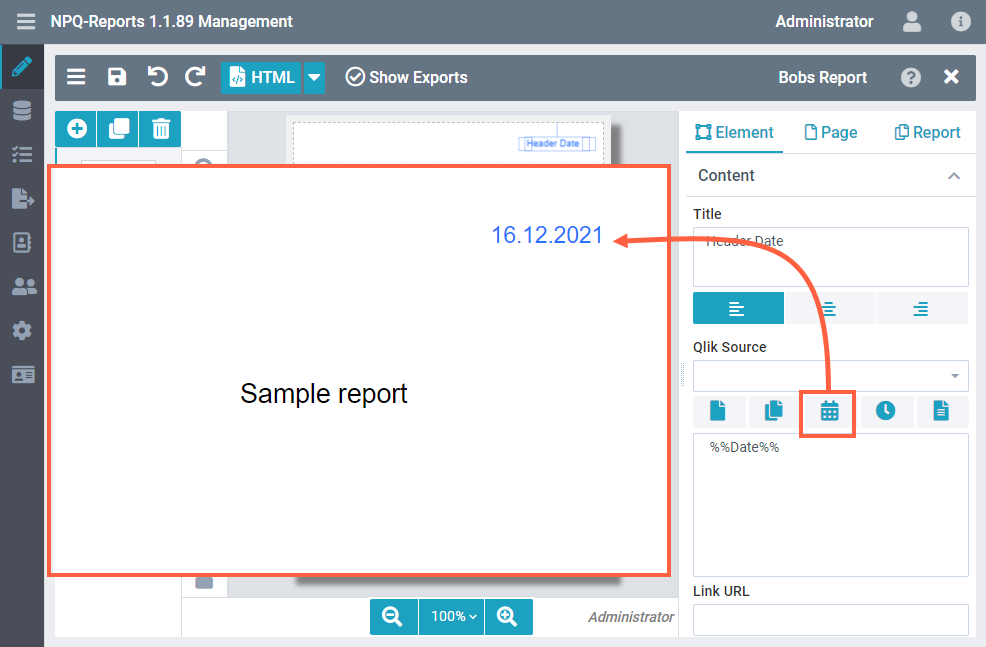
Date
Use the ancoreShare variable icon. You will see the pasted date variable as follows in the content field, and this will display the current date on the report at the time when the export is being generated.
Result:
KPI
Specify the following Qlik Expression to add a KPI, such as the sum of sales to the report.
= num(Sum([Sales Amount]),'#.##0',',','.')Result:

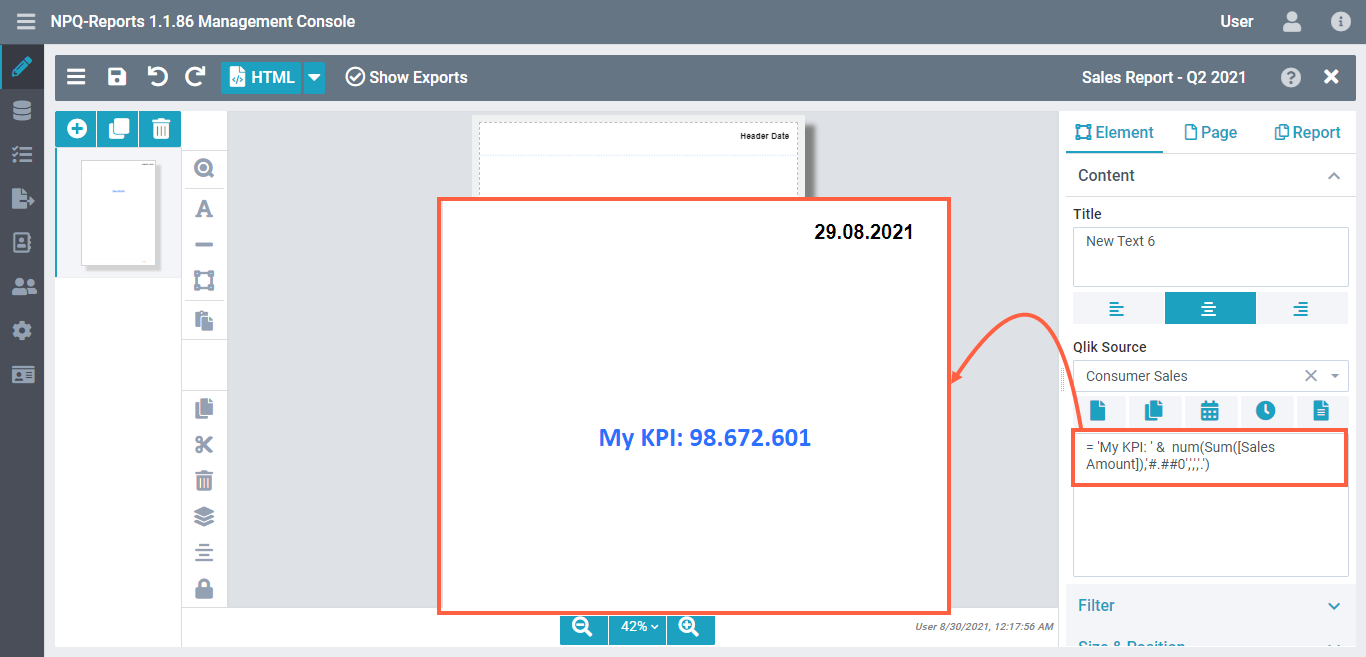
Combine expression with text
Specify the Qlik Expression as follows to combine your text with a KPI.
= 'My KPI: ' & num(Sum([Sales Amount]),'#.##0',',','.')Result:
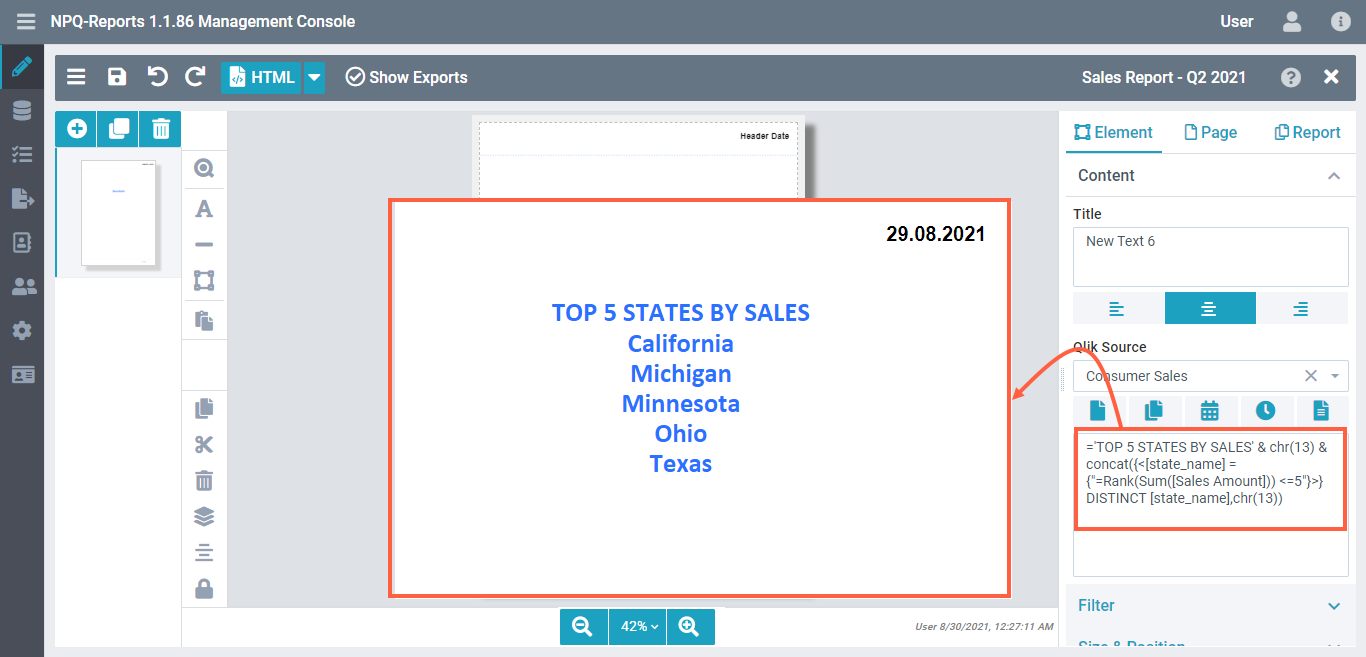
Top 5 rank
Specify the Qlik Expression as follows to populate the top 5 ranking from your filtered data. In this example, the expression will fetch the currently filtered data (e.g. the states), sort the values of their corresponding value (e.g. sales), and lists the top 5 of them - e.g. creating a rank of the 5 top-selling states.
='TOP 5 STATES BY SALES' & chr(13) & concat({<[state_name] = {"=Rank(Sum([Sales Amount])) <=5"}>} DISTINCT [state_name],chr(13))Result:
Refer to the Qlik documentation to know more about Qlik Expressions.
Link URLThe Link URL setting allows you to add any kind of link to the Text element. When the report is generated, the URL is embedded in it. Clicking the text on the report redirects the user to the URL specified here. Setting a link is particularly useful when you want users to access the live view of your app content in the Qlik environment. Make sure the users have sufficient access rights. | 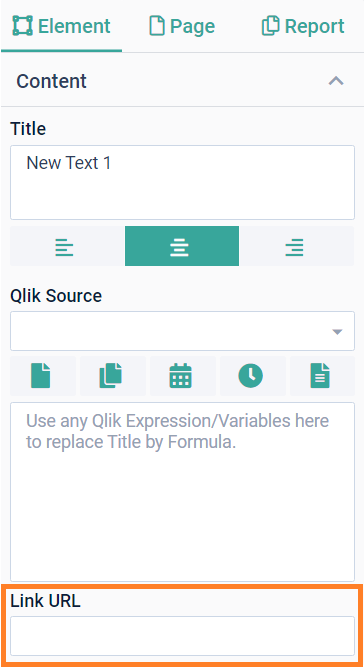 |
Filtering dataUsing the Filter settings, you can restrict, reduce and focus the data that you want to show on your report, from the Qlik application. To access filter settings for text elements, perform the following steps.
Top and ParetoThis setting is only available for QlikView sources. It lets you conveniently order and sort the values of a field. | 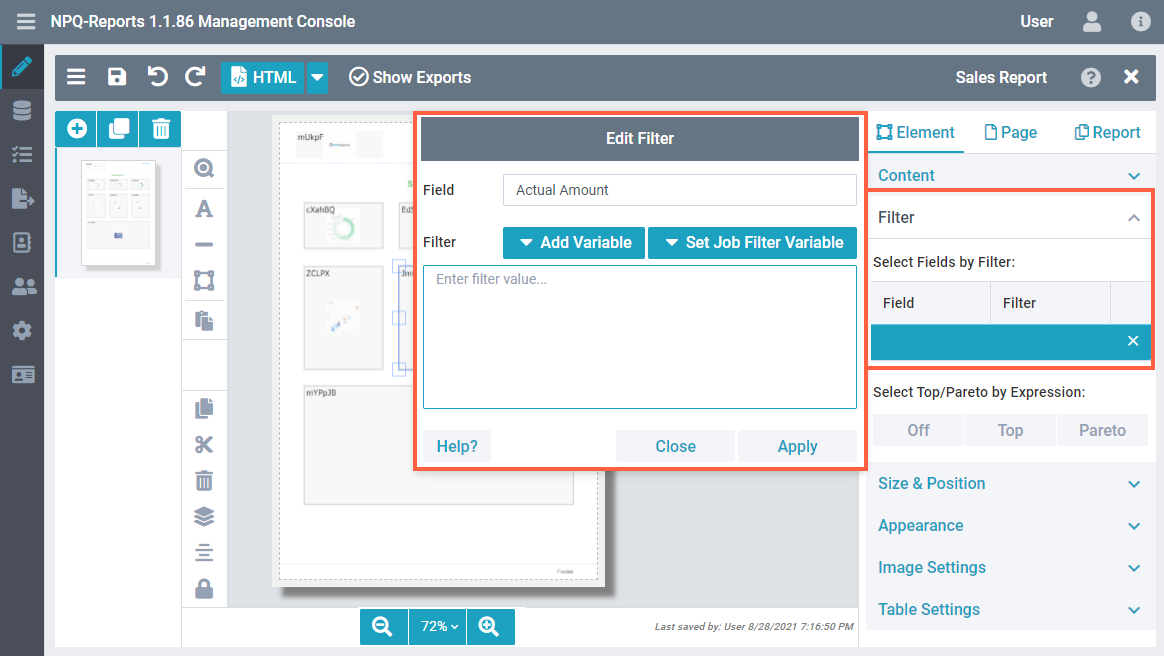 |
Size and position
You can quickly drag, drop, resize, and order your elements on the report. However, for further precision, the system also offers absolute control over sizing and positioning using numeric values to easily create pixel-perfect reports.
When sizing and positioning elements using mouse drag operations, you will also see design guides (shown as green lines on the image) to help you with correct placement. For Text elements, you have the following options available: PositionYou can specify the text element position by specifying its distance from the white space on the designer sheet. The position settings specified here are calculated in addition to the Page Margin specified in the Page Settings. For example, if you have specified the page margin as 5 mm, and the left margin as 15 mm, then the text element would be placed at 20 mm from the left edge of the page, as shown in the image.
The Fixed option is not the same as the Lock provided on the Toolbar.
NOTE: If you have enabled Header on the Page Settings and your element touches inside the header area, it will be repeated on each report page. | .png) 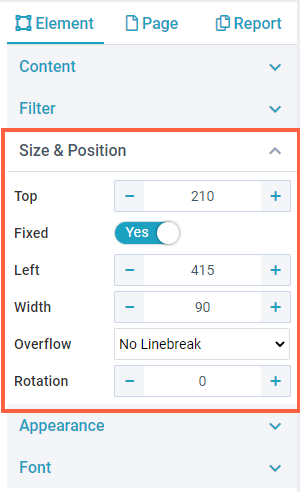 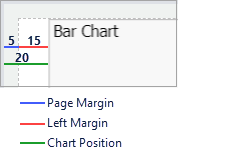 |
Size
NOTE: The text element can only have a width, but not a specific height. If the No Linebreak option is selected, the text element will be as high as the one line of text (depending on the font size). For Line break, the text element will be as high as the content will fill it. Only static content is predictable, e.g. a title or a header. The images show how the line break works to adjust the text within the element width. Note Text elements with dynamic overflowing content shift elements placed below them further below when they grow. You can enable the Fixed position for the below elements to prevent that. RotationSpecifies the angular placement of the element on the report page. | No Linebreak: 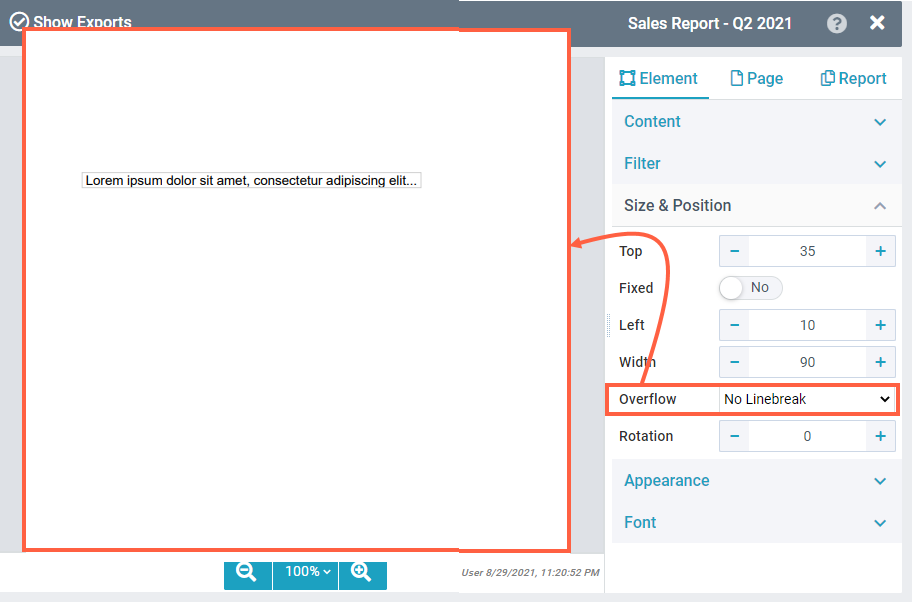 Linebreak by word: 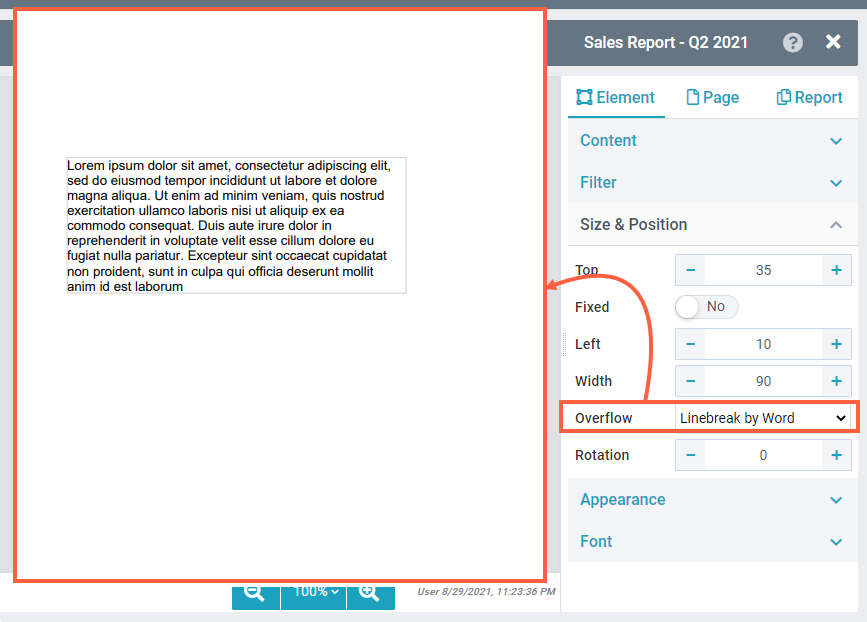 Linebreak by character: 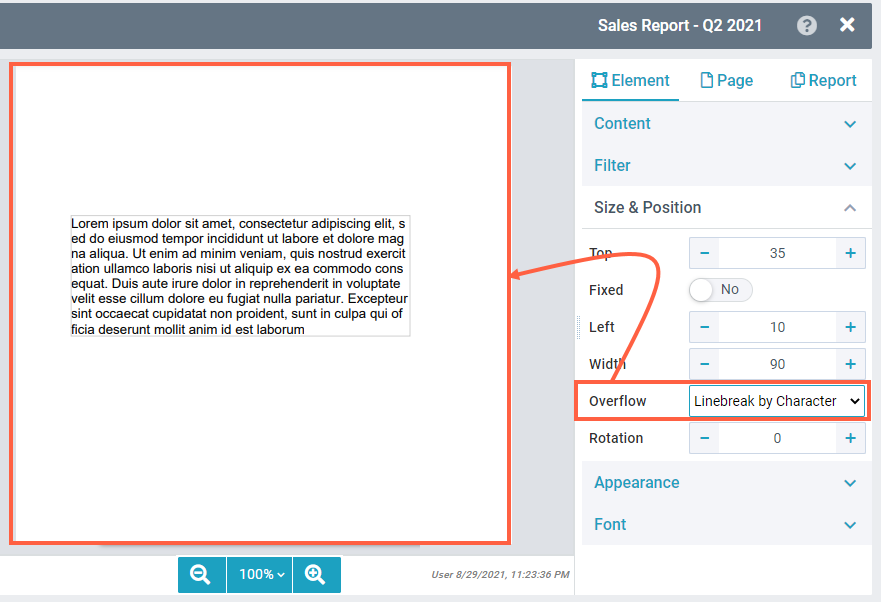 |
Appearance
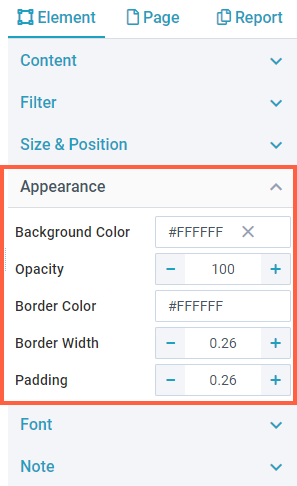
As the name suggests, the Appearance settings allow you to define how the text elements look.
|  |
Font
Click the Font tab to specify the font properties of the text element.
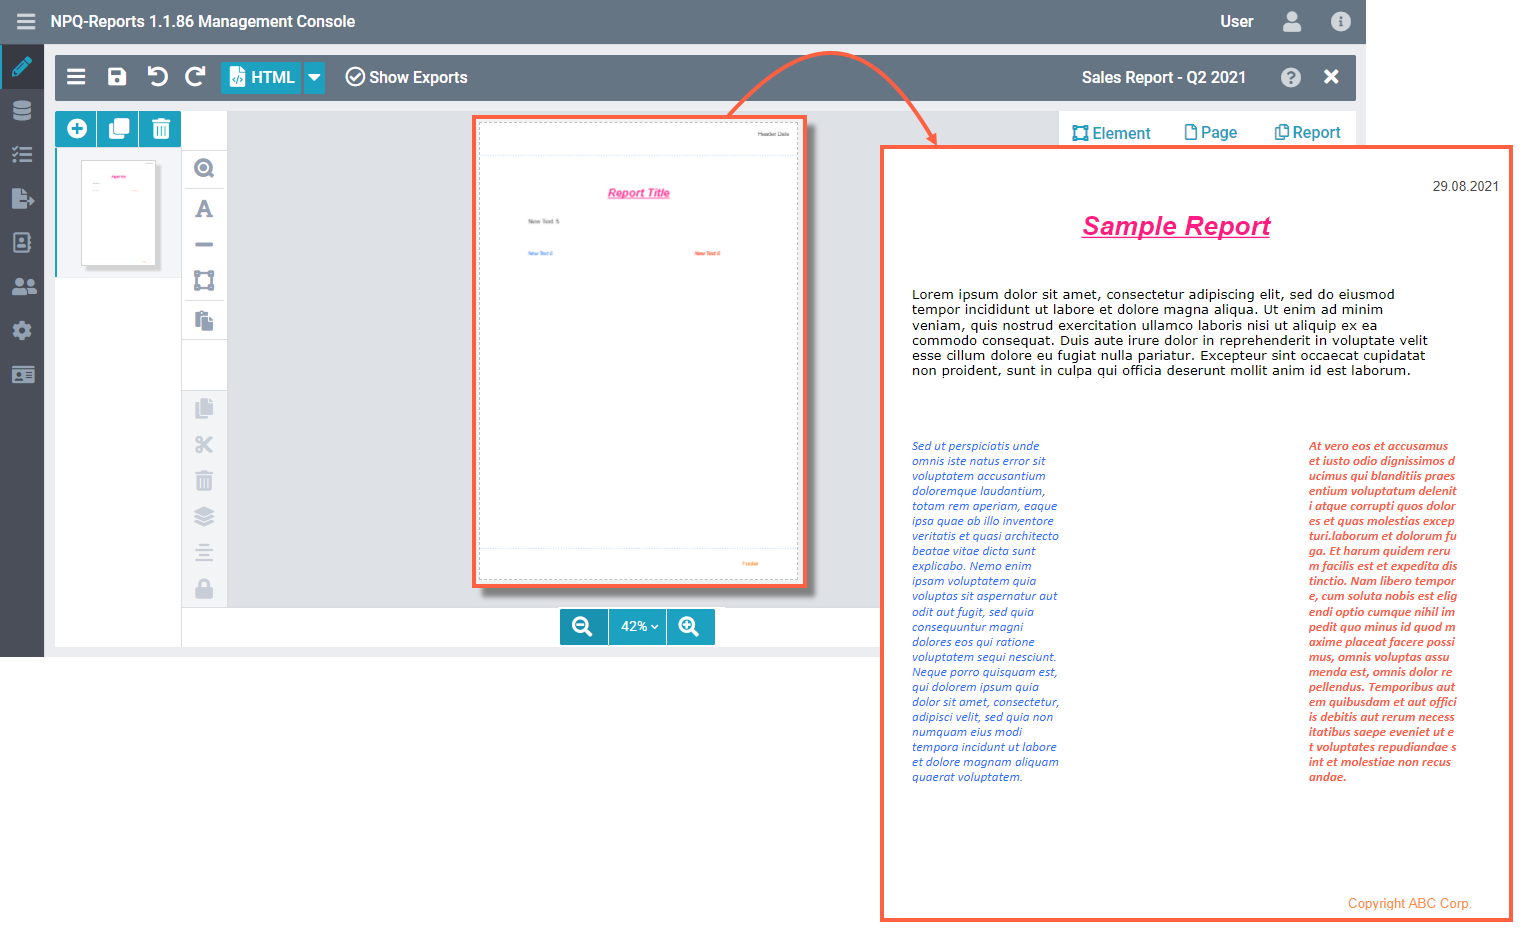
Please note, the font settings apply to the whole text element. To define specific font styles for different content types, add separate text elements for each type. Here's a sample report with different styles for header, date, and content.
|  |
Barcode
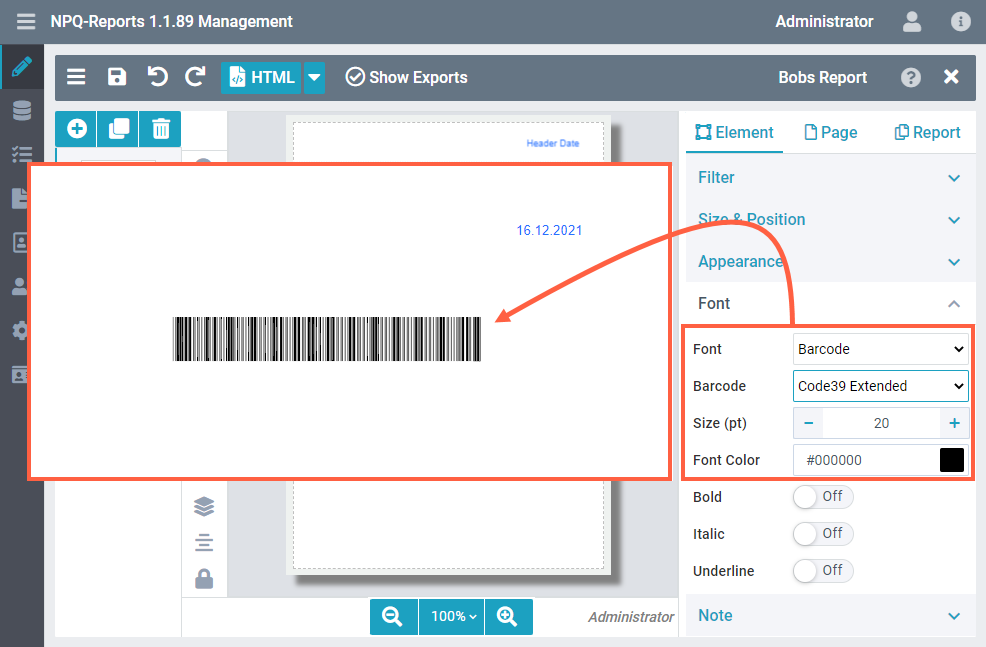
ancoreShare Server supports most of the standard barcode types. If you select the Barcode option from the Font list, the visual font in the element on the designer page turns to monospace (to indicate the barcode mode).
The width of the barcode image is still determined by the width you set for the element and not by content. So, the Overflow setting in Size and position has no effect.
Consider that in case the lines get too dense (it might get hard to read for barcode scanners).
You can control the height of the barcode with the Font size.
The image on right shows a sample report with a barcode font.
When working with barcodes, it's recommended to test the generated code with a scanner to ensure it can be read properly. Some scanners require the code to follow a certain width and height, so you may have to adjust the element accordingly.
You can use barcodes both in the content and title area.
Note
You can add notes to your text elements to provide additional information to your users on the export, when generating in PDF or PPTX format. For example, you can add notes for commenting on something, drawing attention to a specific area in the report, taking a note for yourself, giving some context for colleagues, adding information that is not in the text, and so on. To add a note:
If you generate a PDF export, then the notes are exported as actual annotations in the PDF file. Users with sufficient privileges can further edit them too, which enables active collaboration. In the case of PPTX exports, the notes are shown in the Notes area at the bottom of each slide. As the PPTX does not show notes on elements, all the notes are shown collectively at the bottom of each page/slide. It is recommended to use Titles for notes to segregate them for each element. | 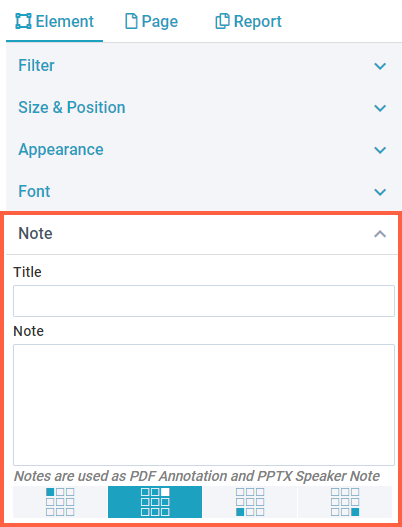 |
Next Steps:
- Now add Charts, Tables, or Line and Rectangles to your report.