Intro
This article only coveres the basic settings for Table Object elements. Further you can have a look at:
- Element properties
- Table Styling
- Styling Columns
- Or go back to Qlik Object - Tables for a more detailed overview
Basic Settings
Add and select a table object and set general element properties.
Adding table object
- On your Sense sheet, select the ancoreShare button to which you want to add the element.
- On the Properties panel, click Report Elements > Add Element.
- From the displayed options, the Object is already selected by default.
If you modify an existing element, click on Type and select Object from the dropdown list. - Click the Select Qlik Object button and scroll down to the following section for next steps.
NOTE: The Add Element button is always available at the bottom of the properties panel. For multiple elements, please scroll down to see the button.
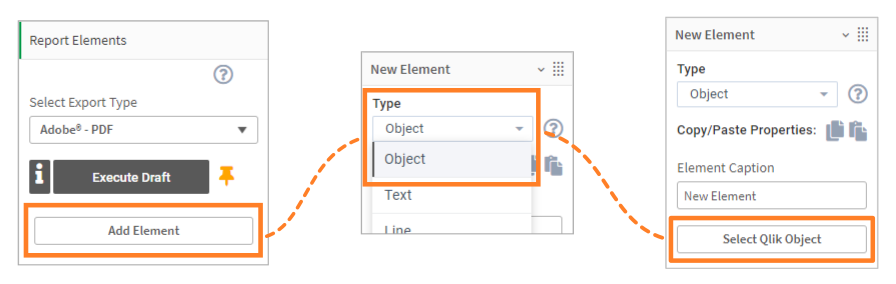
Selecting table object
- Click the Select Qlik Object tab.
- From the displayed Select sheet drop-down list, choose the sheet from which you want to pick the table. You will only see the sheets to which you have access.
- Click a table to select it, set positioning properties first, which are explained in the next segment below, and then click Apply to exit the window.

Positioning and sizingFor convenience, you can specify the main object settings for positioning and sizing the element already here. The same settings are also available on the Properties panel, and you can change these properties from there at any time. To position and size the table on your report, you can set:
These settings are only general positioning properties. To define the precise position and size of an element, you have to combine the three settings: Anchor, Size, and Spacing. To learn more about how all the positioning and sizing settings work together and affect each other and how to precisely position the elements on your report by combining them, go to Positioning and Sizing elements. Once done, click Apply to save your changes and close the window. | 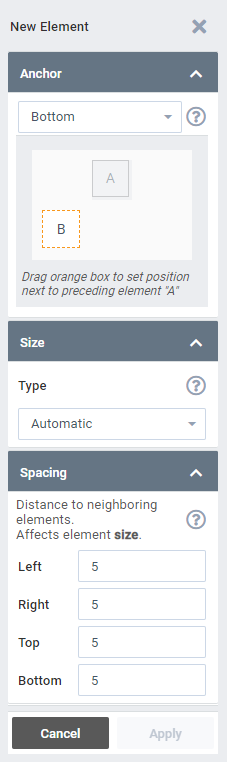 |
CaptionWhen you add and select a table object, the type of object and the Sense ID of the table are automatically populated as the Caption, and a thumbnail showing the Sense visualization is added to the Properties panel.You can rename this field to provide a meaningful caption that will help you in navigating through your report elements. |  |
Link to URLIf you have selected the Process Table as Image option, you will see a Link to URL field. This allows you to add a link to the table (image) object. When the report is generated, the URL is embedded in it. Clicking the table image on the report redirects the users to the URL specified here. This is particularly useful when you want users to access the live view of the object in the Sense environment (ensure they have sufficient access rights). You can also use this to redirect users to a website, or any other kind of link. No link in Preview Window You will not be able to see or click the link in the Preview window. Download a draft report to verify the correct working of your link. Only as image This setting is only available, if the option Process Table as Image is enabled in the table settings. | 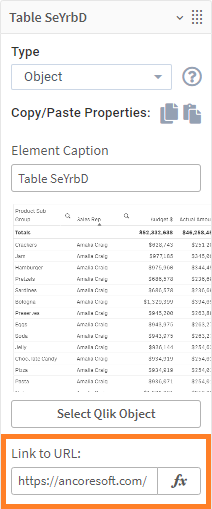 |
Calculation conditionIn the Calculation Condition field, click fx to open the expression editor. Specify an expression to set a condition that needs to be fulfilled (true) for the object to be displayed on the report. It works just like the Activation Condition but is specific to each report element. Refer to the Qlik documentation to know more about expressions. | 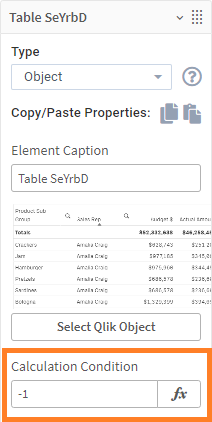 |
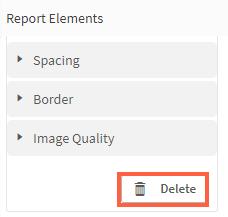
Deleting table objectAt any time, you can click the Delete button at the bottom of the properties box to delete the table element. | |
 | .png) |
Next Steps
- Proceed with Element properties
- Have a look at the Table Styling options
- Or go back to Qlik Object - Tables for a more detailed overview