Intro
Now that your report file is generated, it’s time to set up how and where to distribute it. With ancoreShare, sharing Qlik reports is simple and flexible. Whether you need to download reports locally, send them via email or WhatsApp, store them in platforms like Dropbox or the ancoreShare Store, or integrate with automation platforms like Qlik Application Automation or Microsoft Power Automate offering hundreds of connectors, ancoreShare offers a wide range of options to fit your organization’s needs.
You can dynamically configure one or multiple sharing methods, ensuring your reports reach the right audience with minimal effort. Additionally, you can set up conditions to adapt deployment based on specific criteria, making your distribution even more targeted and efficient. The following sections guide you through setting up each option, including step-by-step instructions for integrating automation tools.
Export Options
To navigate and configure the export settings, perform the following steps:
There's also a feature within the preview window to download or copy the current Report Page as Image. | 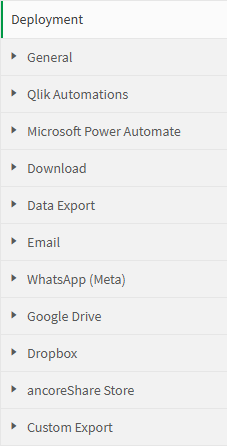 |
GeneralThe General settings allow you to enable the Preview Window and customize the Export Progress Window. Preview WindowThe Preview Window is a PDF viewer that allows you to review your report before sharing it. This feature is available only for PDF exports. After generating a report by clicking the ancoreShare button in your Qlik sheet, the Preview Window will open, displaying the generated PDF. Within the Preview Window, you’ll find options to download the report, email it, send it to Dropbox, or download/copy the current page as an image. You can also make changes to your Qlik sheet selections, refresh the report, and see the updated PDF in real-time before sharing it via available options. For more details, see the Preview Window section. | 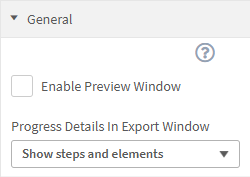 |
Export Progress WindowWhen you generate a report, ancoreShare shows a progress popup that tracks the processing steps in real-time. This window displays the number of Qlik objects in your report, how many have been processed, and which object is currently being worked on (caption and ID). You can customize the information shown in the progress popup by choosing from the following options:
The following screenshot shows the Export Progress Window with the "Show steps and elements" option selected. The example shows that currently the third out of five elements named "Kpi" and with the Qlik ID "sKDevh" is being processed.
These settings also apply to the Execution Window when Background Execution is enabled, allowing the same customizable process information to be displayed during report generation. | 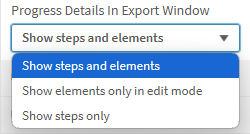 |
Qlik AutomationsEnable this section to send your generated report file(s) to Qlik Application Automations. | 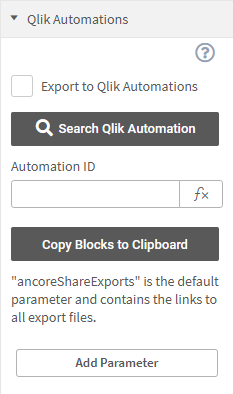 |
Microsoft Power AutomateEnable this section to send your generated report file(s) to Microsoft Power Automate and utilize 300+ connectors to share your report. Watch this video to learn more: | 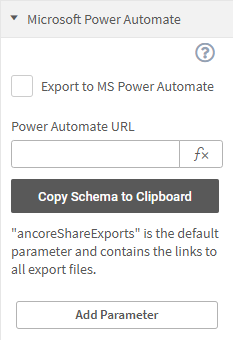 |
DownloadSimply downloading reports on demand is a very direct and popular way of consuming but also distributing reports across most organizations. ancoreShare allows you to download your reports directly from the browser where you are viewing reports in your Sense sheet, or create a download link to share. Default This export option is enabled by default. | 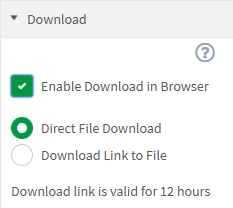 |
Data ExportData forms the base of all the insights derived from your reports. You may want to use the data shown in your reports elsewhere for calculations or as a source for some other tools or reports like in your Excel environment. Using the Data Export feature, you can enable the extraction of pure data out of all the Table elements in your report in form of Excel or CSV files. Learn all about this feature in article Data Export. |  |
Emailing reports is still one of the most popular ways of sharing information among teams and stakeholders across organizations. You can send emails by clicking the ancoreShare button on your Qlik sheet. All you need to do is to configure your email provider either via Brevo (formerly Sendinblue) or ancoreShare Server, and optionally specify your recipients and email content, and you are all set! You can choose if a preset email is sent automatically with the generated report or if you allow to Show E-Mail Dialog to the user to make changes to the email before sending it. If this option is enabled, you will see an email icon on the preview window header. You can use it to open the email dialog there too.
See the Emailing Reports section to learn how to configure the email providers and learn more about the email dialog. |  |
Enable this section to share your generated report file(s) via WhatsApp. Watch this video to learn more: Add CSP You need to allow the directive "connect-src" for the Origin URL "graph.facebook.com" in a CSP entry (Content Security Policy) in your Qlik Cloud Administration interface. |  |
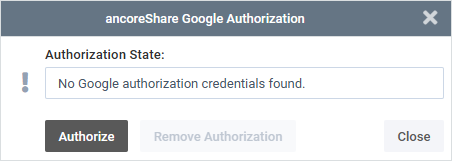
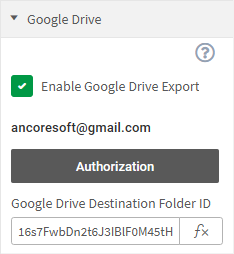
Google DriveWith the Google Drive export option, you can seamlessly save your report files directly to a Google Drive folder. Here’s how to set it up: 1. Enable and Authorize Start by enabling this deployment option via the checkbox. Click Authorization, which opens a small window showing the current authorization status. If authorization hasn't been set up yet, click Authorize to initiate the process.
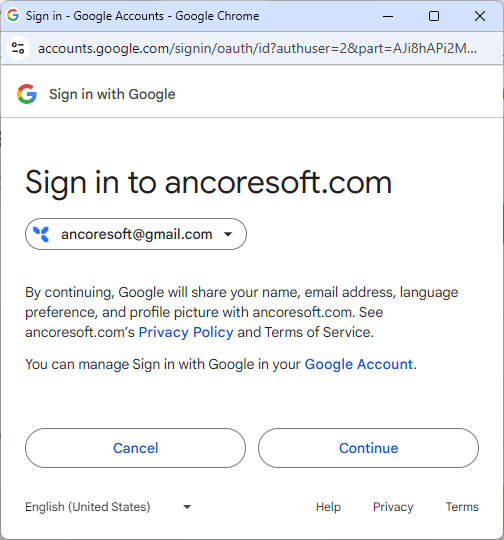
A Google sign-in window will appear, allowing you to select the Google account you want to link. After signing in, grant the necessary permission (as shown in the image below) and click Continue to complete the setup. Note Authorization is specific to each report, so it applies only to this ancoreShare button.
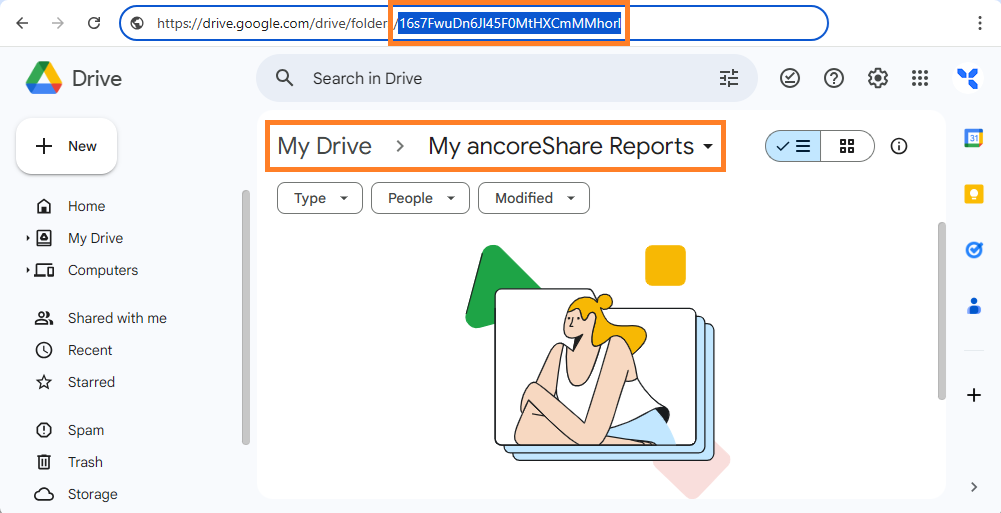
2. Specify Destination Folder (Optional) To set a specific folder for exports, navigate to the desired folder in Google Drive, copy the folder ID from the URL, and paste it into the Google Drive Destination Folder ID field in the ancoreShare properties. The report will then be saved to this folder when executed. This field is accessible with Qlik expressions, allowing you to set up dynamic folder selections - such as choosing a different folder based on specific selections. | 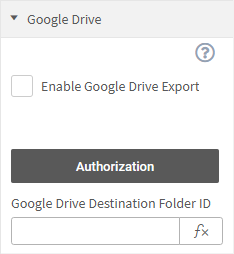 |
3. Revoke Authorization If you need to revoke access, click Remove Authorization in the Authorization window. This will revoke permissions and remove the link for this specific report only, keeping other authorizations unaffected.
|  |
DropboxIn this section you can set up sending your reports to Dropbox. By clicking the ancoreShare button on the Qlik sheet your report gets generated and automatically uploaded to the Dropbox folder specified here. If this option is enabled, you will also see a Dropbox icon on the Preview Window header. You can use it to manually upload your report to the specified Dropbox path from there too.
|  |
ancoreShare StoreThe ancoreShare Enhanced Reporting suite includes a server application for local installation. This ancoreShare Server allows scheduling, offers a file storage, and many other features. Exporting reports generated with ancoreShare Extension directly within Qlik to the ancoreShare Server Store is one way to combine the two tools and get the best of both worlds. This section enables the export of the generated report file(s) directly to the ancoreShare Server Recipient Store, where reports can be organized and recieved in the form of a kiosk (always replacing the current with the new files), an archive (keeping all files), or custom revisions (set how many revisions to keep and when to replace with new files). This is all to be set in ancoreShare Server. Enter multiple Stores (Recipient Emails) separated by comma. |  |
Custom ExportAs the name suggests, this option allows you to access the generated report file via JavaScript and share it on a website, an intranet portal in your organization, or just about anywhere you want. Use the expression editor to access the ancoreSoft JavaScript API. When this option is configured, clicking the ancoreShare button on the Qlik sheet will generate the report and then execute the specified JavaScript code. See Custom Exports With JavaScript for details on how to configure it and see some great examples. |  |
Next Steps:
- Check if you have set all Export Format settings you need.
- Or, share your report over email, Dropbox, or through a custom JavaScript API

